After using photoshop I edited the image and incorporated the extra text using what was available on photoshop. I used a "cutting" theme to give the texture a more plastic blurred effect.
Here is the finished poster.
Tuesday 15 March 2011
FINAL 3D SCULPTURE.
After lots of debate about what the final shape would be, I decided instead of making lots of little shells and glueing them together, I wanted a less obvious theme of repeat in my design. I used all together 12 sheets of yellow card and used the folding technique seen through out my blog and sketch book to create the final design.
This has a repetitive theme and shell influenced texture to it so seemed perfect for my ideas.
I used the stapler to fix them all into shape and here is final 3D object...


To show the repetitive theme at its most obvious I took a photograph of the 3d piece from the inside.

I think the above image could have looked really effective to use as my final piece for the folder, however after lots of query i wouldnt have been able to use it anyway as a different object had to be used in the poster.
Monday 14 March 2011

Poster Design
For my poster design ideas, you need to look in my sketch book as a lot of sketches were involved with my development process, such as layout and text. However the final design the poster was based on is shown in the image below.


I regret to say I didnt screen print the process of getting from here to my final design. As mentioned before my ideas for the poster design are shown through my sketch book work as I found I experiemented all my ideas of design through pen and paper, then simply created the design straight away on the computer and was able to this immediately as I had already planned what my final poster would be.
More shell sculptures...
I wanted a more complicated shell sculpture that maybe involved several shapes I had used before. Here is an example...


I incorporated many shapes to try and resemble a shell shape, however it didnt follow the theme repeat so i didnt feel it was good enough for a final design.


For the above sculpture I used the folded paper technique then made some shell forms out of paper sculptures that were seen in my previous blog post.

I incorporated many shapes to try and resemble a shell shape, however it didnt follow the theme repeat so i didnt feel it was good enough for a final design.

For the shape below I just simply cut slits into a sheet of paper, again just experimenting trying to grasp a simple shape that I could maybe repeat several times to use as a final piece.
Sunday 13 March 2011
Paper Experimentation.
Based on the photos I took of the shells I began making simple shapes out of paper. Here are a few of the shells I made based on my own knowledge on paper manipulation; they do not focus entirely on the techniques Richard Sweeney showed us.

I tried to create this sculpture without using much adhesive or any staples at all if possible just by twisting the paper, an interesting texture was created but I prefer a final piece to be less crumpled, it has a nicer finish if the paper is still smooth and clean cut.


Here the central swirling form is very recognisable as a shell shape.


For the shell below I did use Richard Sweeneys techniques of slicing the paper and folding it to create 3d form. I then scored the paper at the front to create a bend in the shape of a shell.

Here is a zoomed image of the scored fold.

For this sculpture I cut the paper into tabs again, but this time used glue to stick each tab together, for me this is the most recognisable sculpture relating to a shell form, because of its hollow centre and bend of direction.
The paper also casts a shadow creating an interesting texture similar to that of a shell.


The same sculpture just a different angle photograph.

I made this sculpture using a similar method to the one above I just changed the tab sizes.

Here is a simple swirling shell form that could easily be repeated to make up a larger sculpture. It would look interesting on a really small scale and made out of card. I could try to use this simple shape several times to create a larger different shell form. Then it would follow the theme of repeat.

3 sheets of paper were used to create this sculpture, each layer just stapled slightly looser than the sheet beneath it.

Thursday 24 February 2011
Work from other Artists...
I surfed the internet for paper sculptures of shells, just to see if there was already any work out there that could help me. Here were a few things I found...

DAVE WOOD.
I came across an artist who creates many things in his work as a designer, however he had actually created shells through the art of paper manipulation so I thought I should include him in my research.
He takes a different approach to richard Sweeney, in that Dave Wood works on a much smaller scale and it is not based so much on 3D work but on the texture and pattern of the paper design.
Here are 3 links to his work on shells , as I was unable to post the images on blogger for copyright reasons.
https://www.davewood.com.au/new/paper-sculpture-shell-series-conch-paper-sculpture-p-26.html?osCsid=vt142l4hmkvjdcsuvqim26d7o5
https://www.davewood.com.au/new/paper-sculpture-shell-series-nautilus-paper-sculpture-p-27.html?osCsid=q7hfltk57vh8usqe1d4kp1nup1
https://www.davewood.com.au/new/paper-sculpture-shell-series-scallop-paper-sculpture-p-25.html?osCsid=ru5qqhpn0f5omdoq727nqhuoq0
PAPER SCULPTURES BY ALLEN AND PATTY ECKMAN
I came across another talented artist who has created the most amazing sculptures I have ever seen just through the use of paper - Allen and Patty Eckman.
Unfortunately I could not find out much information on the process of how they build the designs but their work is absolutely mind blowing so It was definitely a must do when it came to including them in my research and work that influenced me. Here is a link to their web page for reference purposes...
http://safa.tv/802,vivid-paper-sculptures-by-allen-and-patty-eckman,4.html
And here are their amazing paper sculptures...


They seems to follow a particular War/ Battle theme in their work...

And they are the few selected sculptures I chose to include from Allen and Patty Eckman, a very different approach to paper manipulation but one that definitely does them proud, their work is fantastic to say the least.

I couldnt manage to find out who this piece was by but the repetive them to it seemed fitting for this module and the general pattern and shape of this sculpture could help me with my ideas on shells.
From here on I started to look for particular Artists that worked with paper to create sculptures, here are 2 artists that created work I found most influential...
DAVE WOOD.
I came across an artist who creates many things in his work as a designer, however he had actually created shells through the art of paper manipulation so I thought I should include him in my research.
He takes a different approach to richard Sweeney, in that Dave Wood works on a much smaller scale and it is not based so much on 3D work but on the texture and pattern of the paper design.
Here are 3 links to his work on shells , as I was unable to post the images on blogger for copyright reasons.
https://www.davewood.com.au/new/paper-sculpture-shell-series-conch-paper-sculpture-p-26.html?osCsid=vt142l4hmkvjdcsuvqim26d7o5
https://www.davewood.com.au/new/paper-sculpture-shell-series-nautilus-paper-sculpture-p-27.html?osCsid=q7hfltk57vh8usqe1d4kp1nup1
https://www.davewood.com.au/new/paper-sculpture-shell-series-scallop-paper-sculpture-p-25.html?osCsid=ru5qqhpn0f5omdoq727nqhuoq0
PAPER SCULPTURES BY ALLEN AND PATTY ECKMAN
I came across another talented artist who has created the most amazing sculptures I have ever seen just through the use of paper - Allen and Patty Eckman.
Unfortunately I could not find out much information on the process of how they build the designs but their work is absolutely mind blowing so It was definitely a must do when it came to including them in my research and work that influenced me. Here is a link to their web page for reference purposes...
http://safa.tv/802,vivid-paper-sculptures-by-allen-and-patty-eckman,4.html
And here are their amazing paper sculptures...

There isnt a repetitive theme to their work, but I felt so fascinated by their sculpture designs that they should be included in my blog, as they are definitely a pair of very talented artists who I can aspire to in terms of this project.

They seems to follow a particular War/ Battle theme in their work...

And they are the few selected sculptures I chose to include from Allen and Patty Eckman, a very different approach to paper manipulation but one that definitely does them proud, their work is fantastic to say the least.
Developing Research - My Photography Of Shells.
These primary source photographs of shells were taken by myself and are from the collection we have found and kept from many holidays abroad or down South. Any shells included in this post, will have a particular texture or repetitive pattern to it I find interesting or relevant to my ideas.


I generally just found the shape of this shell interesting and it reminded me of one of my earlier paper sculptures when I first attended Richard Sweeneys workshop. This would be the kind of shape I would maybe like to create for my final design. Their are 2 areas of repeat in this shell, the rocky areas that are sticking out at the front, and the decreasing shape at the back.

Again this starry like shape shell is very repetitive in form and fits in well for the theme of this project.


The simple form of this shell, in the respect that it naturally grows larger at one end could easily be created through paper manipulation. And with a few scores here and there a similar texture and pattern could be created. Well, Il have a good go at it anyway...


I included this photograph just for fun, I found that the beach huts were appropriate !

The swirling circular movement of the shell towards the central point could look really interesting If I manage to create it with paper.

I generally just found the shape of this shell interesting and it reminded me of one of my earlier paper sculptures when I first attended Richard Sweeneys workshop. This would be the kind of shape I would maybe like to create for my final design. Their are 2 areas of repeat in this shell, the rocky areas that are sticking out at the front, and the decreasing shape at the back.

Again this starry like shape shell is very repetitive in form and fits in well for the theme of this project.

The texture of this shell reminded me of the work we did in Richard Sweeneys second workshop, where we scored paper to create an edgy spikey shape. See the photos below.


This was created in Sweeneys second workshop, it was another technique he had shown us for this project.

The simple form of this shell, in the respect that it naturally grows larger at one end could easily be created through paper manipulation. And with a few scores here and there a similar texture and pattern could be created. Well, Il have a good go at it anyway...

A photograph of a collection of shells...

I included this photograph just for fun, I found that the beach huts were appropriate !
Friday 18 February 2011
Natural forms - Shells.
Shells tend to have a repetitive pattern to their shape.
I have chosen to research images of shells on the internet so it broadens my knowledge on their structure and texture. From this research I will experiment with paper to create a sculpture as close to the shapes of the shells in the images below.

The shape of this shell reminds me of an oyster, -another natural form; or in fact the shape of a crabs body. I found the middle part of this particular shell joining the rock together rather fascinating, and it intrigued me as to whether I would be able to create a similar structure through paper manipulation. Soon I will post images of my own paper designs I have developed from this image.
The above and below image was found http://www.seashell-collector.com/

This image reminded me of a paper sculpture I designed in Richard Sweeneys' workshop. I see 2 shapes here, the main body of the shell that holds the smaller ball shaped shell in the centre.
I don't see an exact repetitive theme here in this image however again like the image before it intrigued me to experiment to see if it would be possible for me to make this out of paper.

I thought to include this image I found on Google images as the simple line drawing on the left shows the basic bend and line contour of where i would possibly score the paper to create a similar shape.
I will attempt to create all 3 of the images above using only paper, glue, tape or a stapler...Wish me luck!
Some other primary sources that I could look at would be....
WAVES.
Waves tend to be a very repetitive primary source due to their continuous curvaceous lines and circular forms. The simple cut and fold tab technique that Richard taught us could definitely create a paper sculpture based on the wave form. On a large scale aswell it would look really impressive.
I also have many of my own photographs already that i have taken on previous holidays of waves etc, so I would already have a lot of research and primary source photographs to base my ideas on.

WATER/RIPPLES.
Water ripples are very repetitive in shape and form, the circles becoming smaller and smaller, or the difference in depth of the lines. This kind of texture could be created with paper through Richards scoring technique he showed us, where if you gently scrape the paper with your scalpel and fold, a gentle dent appears. If that technique were top be repeated throughout the sheet of paper it would look really effective.

TREES
Not a primary source I would like to particularly focus on however trees and branches are very repetitive in form. The way one branch leads to several more is a theme you could base a paper sculpture on. The variety of shapes and sizes and length aswell could leave the final piece open with endless opportunity for an interesting detailed design.

FEATHERS.

FLOWERS(ROSES.)
Finall, if you look in my sketch pad I have researched into flowers, before my idea of basing the final piece on a shell was brought about. The petals and curves of the flower are beautiful, and in Sweeneys second workshop I attempted to make a rose flower out of card and tape. The general idea that came to mind with a flower would be to make one flower, then repeat it several times to make a larger flower.

I have chosen to research images of shells on the internet so it broadens my knowledge on their structure and texture. From this research I will experiment with paper to create a sculpture as close to the shapes of the shells in the images below.

The shape of this shell reminds me of an oyster, -another natural form; or in fact the shape of a crabs body. I found the middle part of this particular shell joining the rock together rather fascinating, and it intrigued me as to whether I would be able to create a similar structure through paper manipulation. Soon I will post images of my own paper designs I have developed from this image.
The above and below image was found http://www.seashell-collector.com/

I don't see an exact repetitive theme here in this image however again like the image before it intrigued me to experiment to see if it would be possible for me to make this out of paper.
I thought to include this image I found on Google images as the simple line drawing on the left shows the basic bend and line contour of where i would possibly score the paper to create a similar shape.
I will attempt to create all 3 of the images above using only paper, glue, tape or a stapler...Wish me luck!
Some other primary sources that I could look at would be....
WAVES.
Waves tend to be a very repetitive primary source due to their continuous curvaceous lines and circular forms. The simple cut and fold tab technique that Richard taught us could definitely create a paper sculpture based on the wave form. On a large scale aswell it would look really impressive.
I also have many of my own photographs already that i have taken on previous holidays of waves etc, so I would already have a lot of research and primary source photographs to base my ideas on.

WATER/RIPPLES.
Water ripples are very repetitive in shape and form, the circles becoming smaller and smaller, or the difference in depth of the lines. This kind of texture could be created with paper through Richards scoring technique he showed us, where if you gently scrape the paper with your scalpel and fold, a gentle dent appears. If that technique were top be repeated throughout the sheet of paper it would look really effective.

TREES
Not a primary source I would like to particularly focus on however trees and branches are very repetitive in form. The way one branch leads to several more is a theme you could base a paper sculpture on. The variety of shapes and sizes and length aswell could leave the final piece open with endless opportunity for an interesting detailed design.

FEATHERS.

FLOWERS(ROSES.)
Finall, if you look in my sketch pad I have researched into flowers, before my idea of basing the final piece on a shell was brought about. The petals and curves of the flower are beautiful, and in Sweeneys second workshop I attempted to make a rose flower out of card and tape. The general idea that came to mind with a flower would be to make one flower, then repeat it several times to make a larger flower.

Thursday 17 February 2011
Richard Sweeney Workshop 2
In this second workshop we developed the techniques we learnt previously, but this time we were able to enhance the complications of the paper sculptures as we were allowed to use glue or tape. Which made it a lot easier for us as beginers to create more detailed designs. As one of the hardest things i found about paper manipulation was actually getting the paper to join together through the use of tabs or cuttings.
I am yet to upload photos of natural forms I want to base my paper sculptures around, however I attempted to make designs that resembled a flower, or petals.
Here are the sculptures I made during the workshop.
 This was created using the simple 'score' technique Richard showed us. It involves gently grazing the knife across the paper from one corner to another, then simply folding over the paper.
Here I layered up the paper to try to create the shape of a rose flower. It also holds a strong repetitive theme because of the upwards twirling shape of the paper. I had to use tape on the bottom layer as I was struggling to use the tab method to hold it together.
Below is another design i made during the workshop, however I don't particularly like it as it doesnt really follow the rule of repeat. I was just experimenting with a few more of the paper manipulation techniques Richard taught us that afternoon.

No tape or glue was needed to create the above designs, it was completely random however so not really in fitting with the theme 'repeat.'
I am yet to upload photos of natural forms I want to base my paper sculptures around, however I attempted to make designs that resembled a flower, or petals.
Here are the sculptures I made during the workshop.

Here I layered up the paper to try to create the shape of a rose flower. It also holds a strong repetitive theme because of the upwards twirling shape of the paper. I had to use tape on the bottom layer as I was struggling to use the tab method to hold it together.
Below is another design i made during the workshop, however I don't particularly like it as it doesnt really follow the rule of repeat. I was just experimenting with a few more of the paper manipulation techniques Richard taught us that afternoon.

No tape or glue was needed to create the above designs, it was completely random however so not really in fitting with the theme 'repeat.'
Tuesday 15 February 2011
Continuing with the Sweeney Workshop.
I continued the paper folding after the worshop had finished and tried to create a more complex design that didnt follow the techniques I had used for my other sculptures.

The final outcome of the above piece reminded me of plants or shells that could be found on the beach. It was created by "happy mistakes" that Richard explained are accidents that happen during the folding and cutting process, that actually improve the design instead of ruining it. This enabled me to learn what techniques work and what don't.

I dont particulary feel the above design follows the theme repeat, however it is aesthetically pleasing and exciting to look at. On a larger scale this reminded me of a climbing structure of some sort you may find in a childrens play area.
Again this design was created by cutting tabs into random areas of the sheet of paper and just going with the flow...
Richard Sweeney Workshop 1
The first workshop I attended for this module was lead by the talented designer Richard Sweeney, who scluptures and manipulates paper to create interesting and intricate pieces of art.
Here are a few of his sculptures that I found most aesthetically pleasing and intriguing.


He first showed us a few techniques on how to create simple paper manipulations, however he made it look much easier than it actually was. At first I found it quite difficult, but I began to feel more confident as the workshop went on.
In this worshop we were allowed to use paper only, we could make scores or cut across the paper, cut into the paper and make folds or tabs. But no glue, tape or any other material was to be used. The designs we created were to be influenced by the title of the module ...REPEAT.
Here are a few of my own design (attempts) that follow the techniques Richard had shown us.


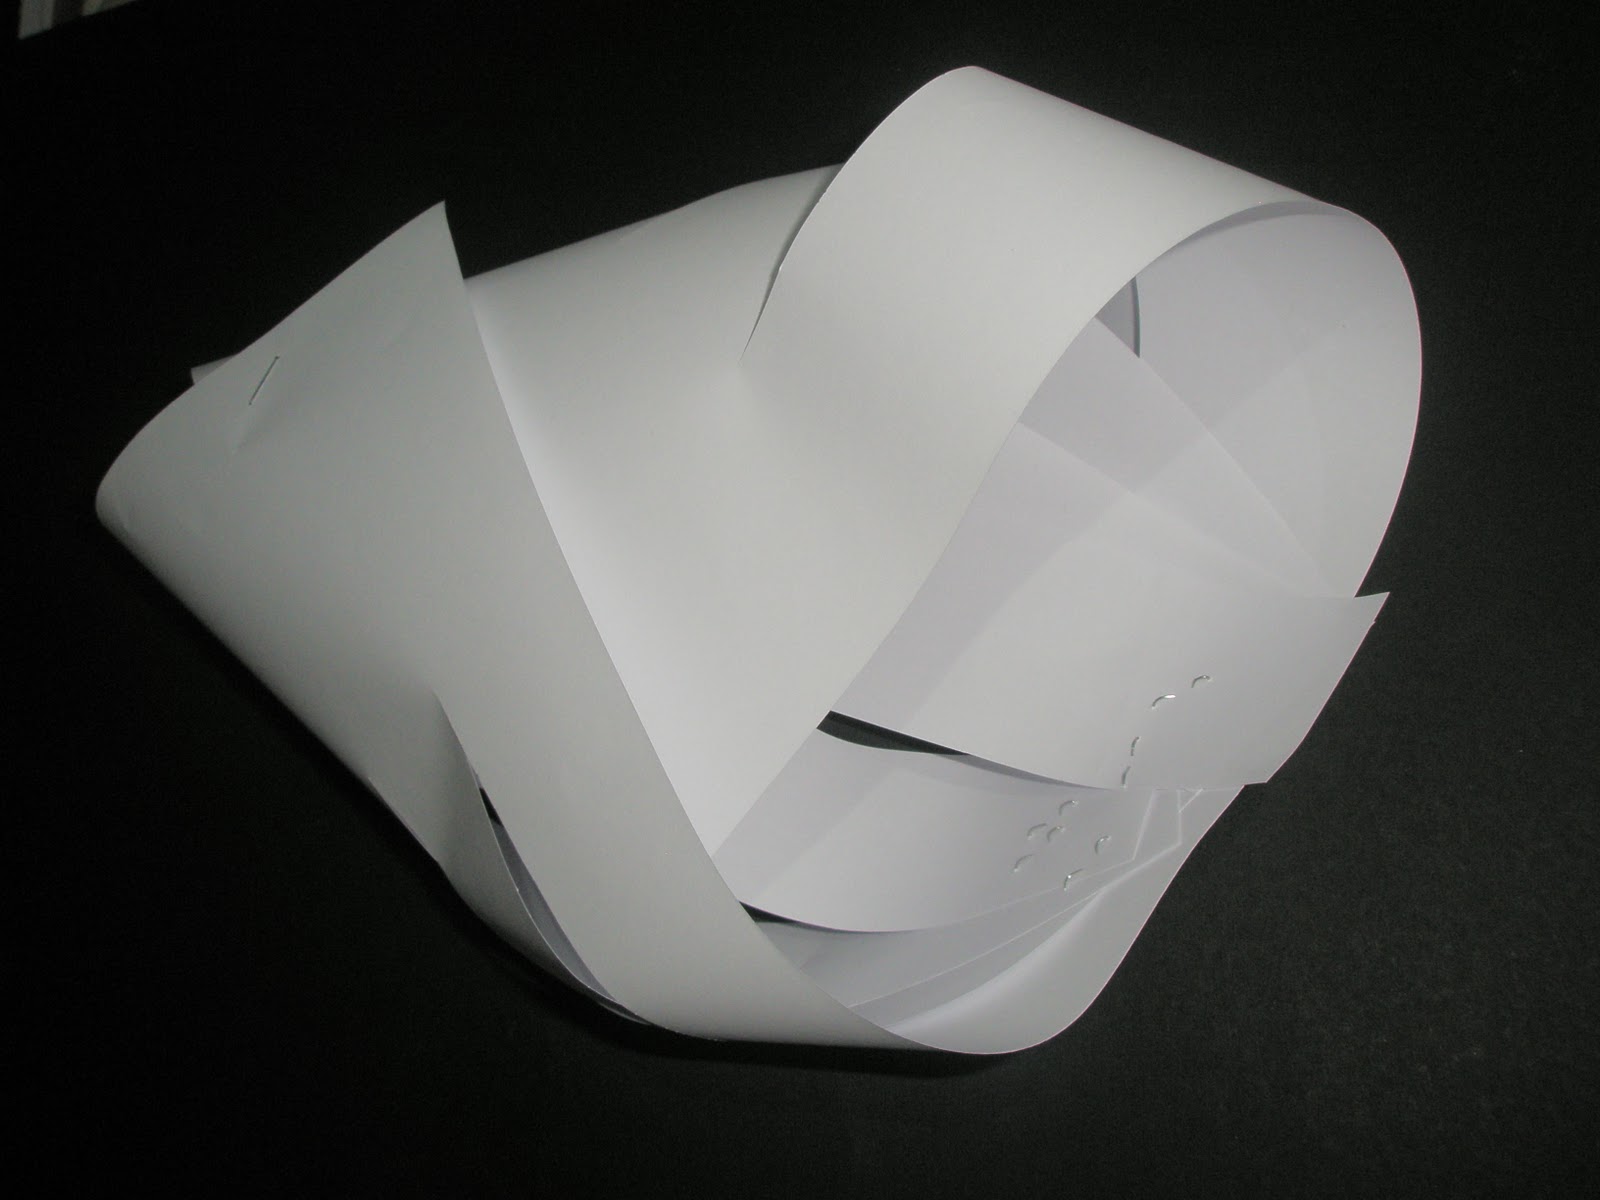
At first I began simply cutting slits and tabs into the paper to create a repetitive pattern, this design reminds me of the sea waves crashing in to shore. Richard explained that it is not only the sculpture that is the art; it is also the photography that portrays the design.
Here is another photograph at a more interesting angle, to make the image more visually pleasing.

On the photo above I feel the presence of the theme "repeat" is much stronger and visible. The way the light casts creating shadow makes the sculpture look more clean cut.
A few more of my designs...

 I stuck with the idea of cutting slits and tabs in to the paper, but this time I made it more complicated by slotting each slit into one another, and at a different angle.


This design was follwing a similar technique but instead of creating tabs, I slot each slit of paper into one another to create a spherical shell sculpture, and then again took photos at an angle to portray the theme "repeat" at its visually strongest.
Here are a few of his sculptures that I found most aesthetically pleasing and intriguing.


He first showed us a few techniques on how to create simple paper manipulations, however he made it look much easier than it actually was. At first I found it quite difficult, but I began to feel more confident as the workshop went on.
In this worshop we were allowed to use paper only, we could make scores or cut across the paper, cut into the paper and make folds or tabs. But no glue, tape or any other material was to be used. The designs we created were to be influenced by the title of the module ...REPEAT.
Here are a few of my own design (attempts) that follow the techniques Richard had shown us.


Here is another photograph at a more interesting angle, to make the image more visually pleasing.

On the photo above I feel the presence of the theme "repeat" is much stronger and visible. The way the light casts creating shadow makes the sculpture look more clean cut.
A few more of my designs...


This design was follwing a similar technique but instead of creating tabs, I slot each slit of paper into one another to create a spherical shell sculpture, and then again took photos at an angle to portray the theme "repeat" at its visually strongest.
Subscribe to:
Posts (Atom)